This pear dessert is all kinds of refreshing fresh fruit, melty chocolate, crunchy almonds…with just a touch of salt and cinnamon! Vegan and grain-free baked pears become sweet and saucy in all the best ways. Trust me, you’ll want to make these Baked Pears over and over again…they’re the perfect light dessert or snack, any time of day!

It will take just 5-minutes to prep the pears, stuff them and get them into the oven. The result is a deliciously perfect dessert for Passover, that doesn’t actually taste like a passover dessert (IYKYK).
Looking for more Healthy Passover Recipes? Discover new and exciting ways to enjoy Kosher for Passover Recipes while maintaining a balanced diet with Vegetarian and Vegan Recipes for Passover.
Ingredient Notes
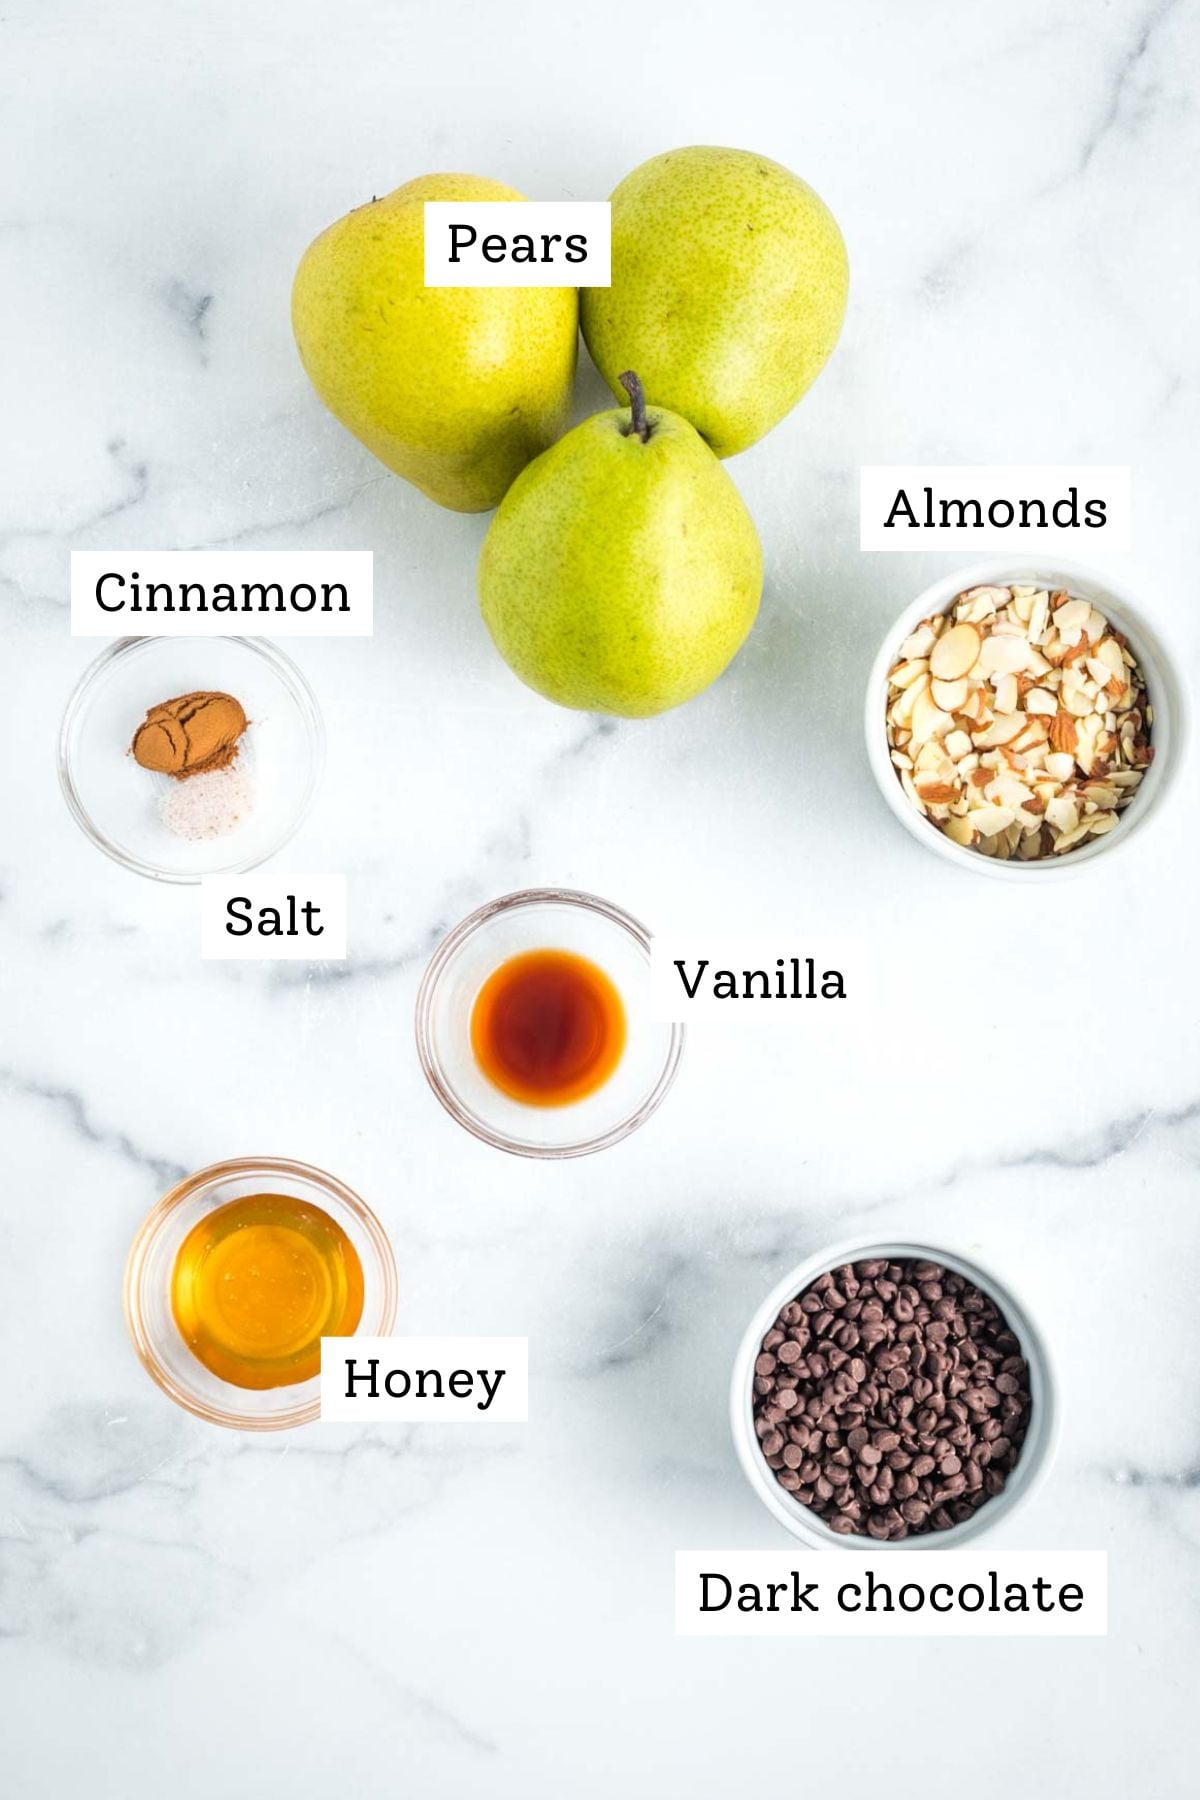
- Pears: Any type will work….bartlett, bosc, red pears. They’re all good.
- Nuts: I love to use thinly sliced almonds in this recipe….if you chose an alternative, roughly chop so the pieces are small, like the chocolate.
- Sweetener: The honey adds just a touch of sweetness and holds the stuffing mixture together. Sub with date syrup or maple syrup.
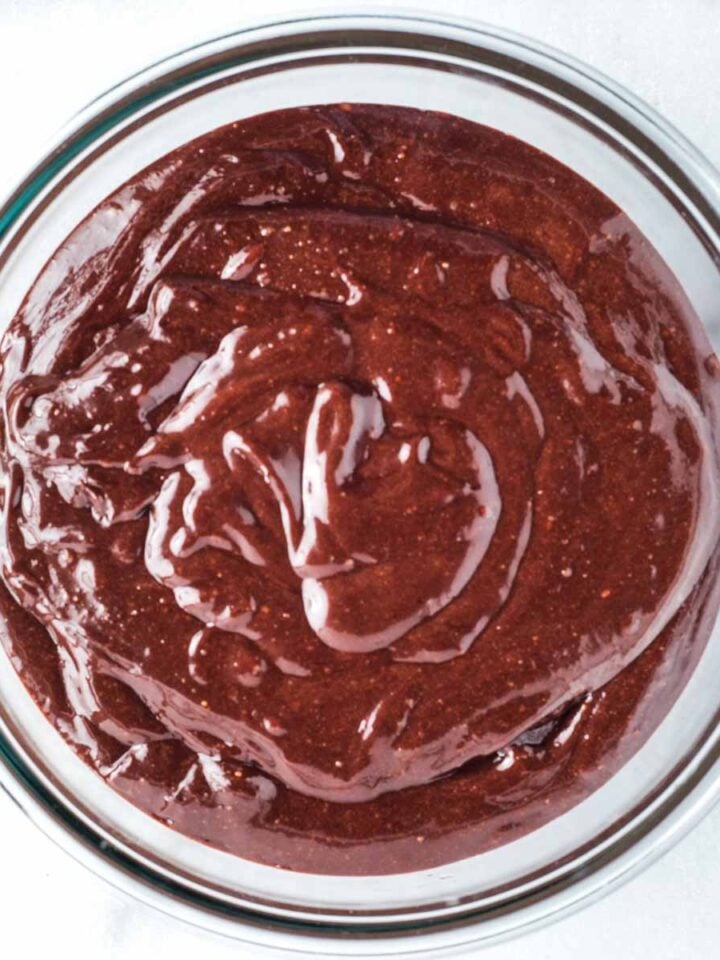
Make the Filling

Add chocolate, nuts, cinnamon, salt, honey and vanilla to a medium sized bowl.

Mix until thoroughly combined. Just keep mixing, you’ll get there.
Prep the Pears

Start by cutting pears in half, through the core and stem.
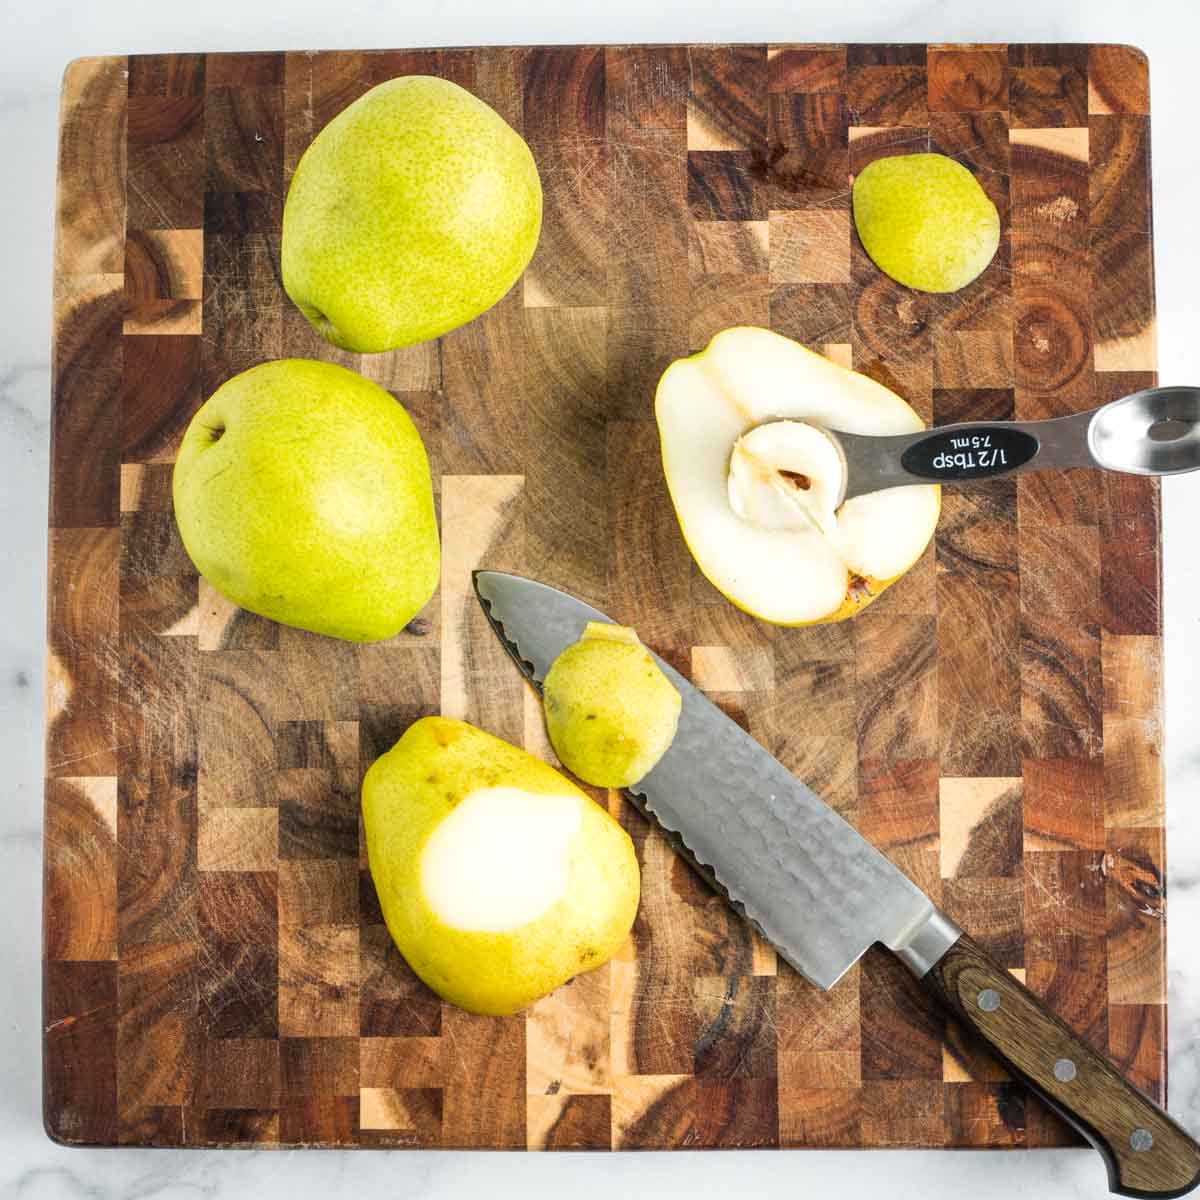
Then, cut a super thin slice off the outer edge so the pear half can sit flat. Scoop the core and seeds out.
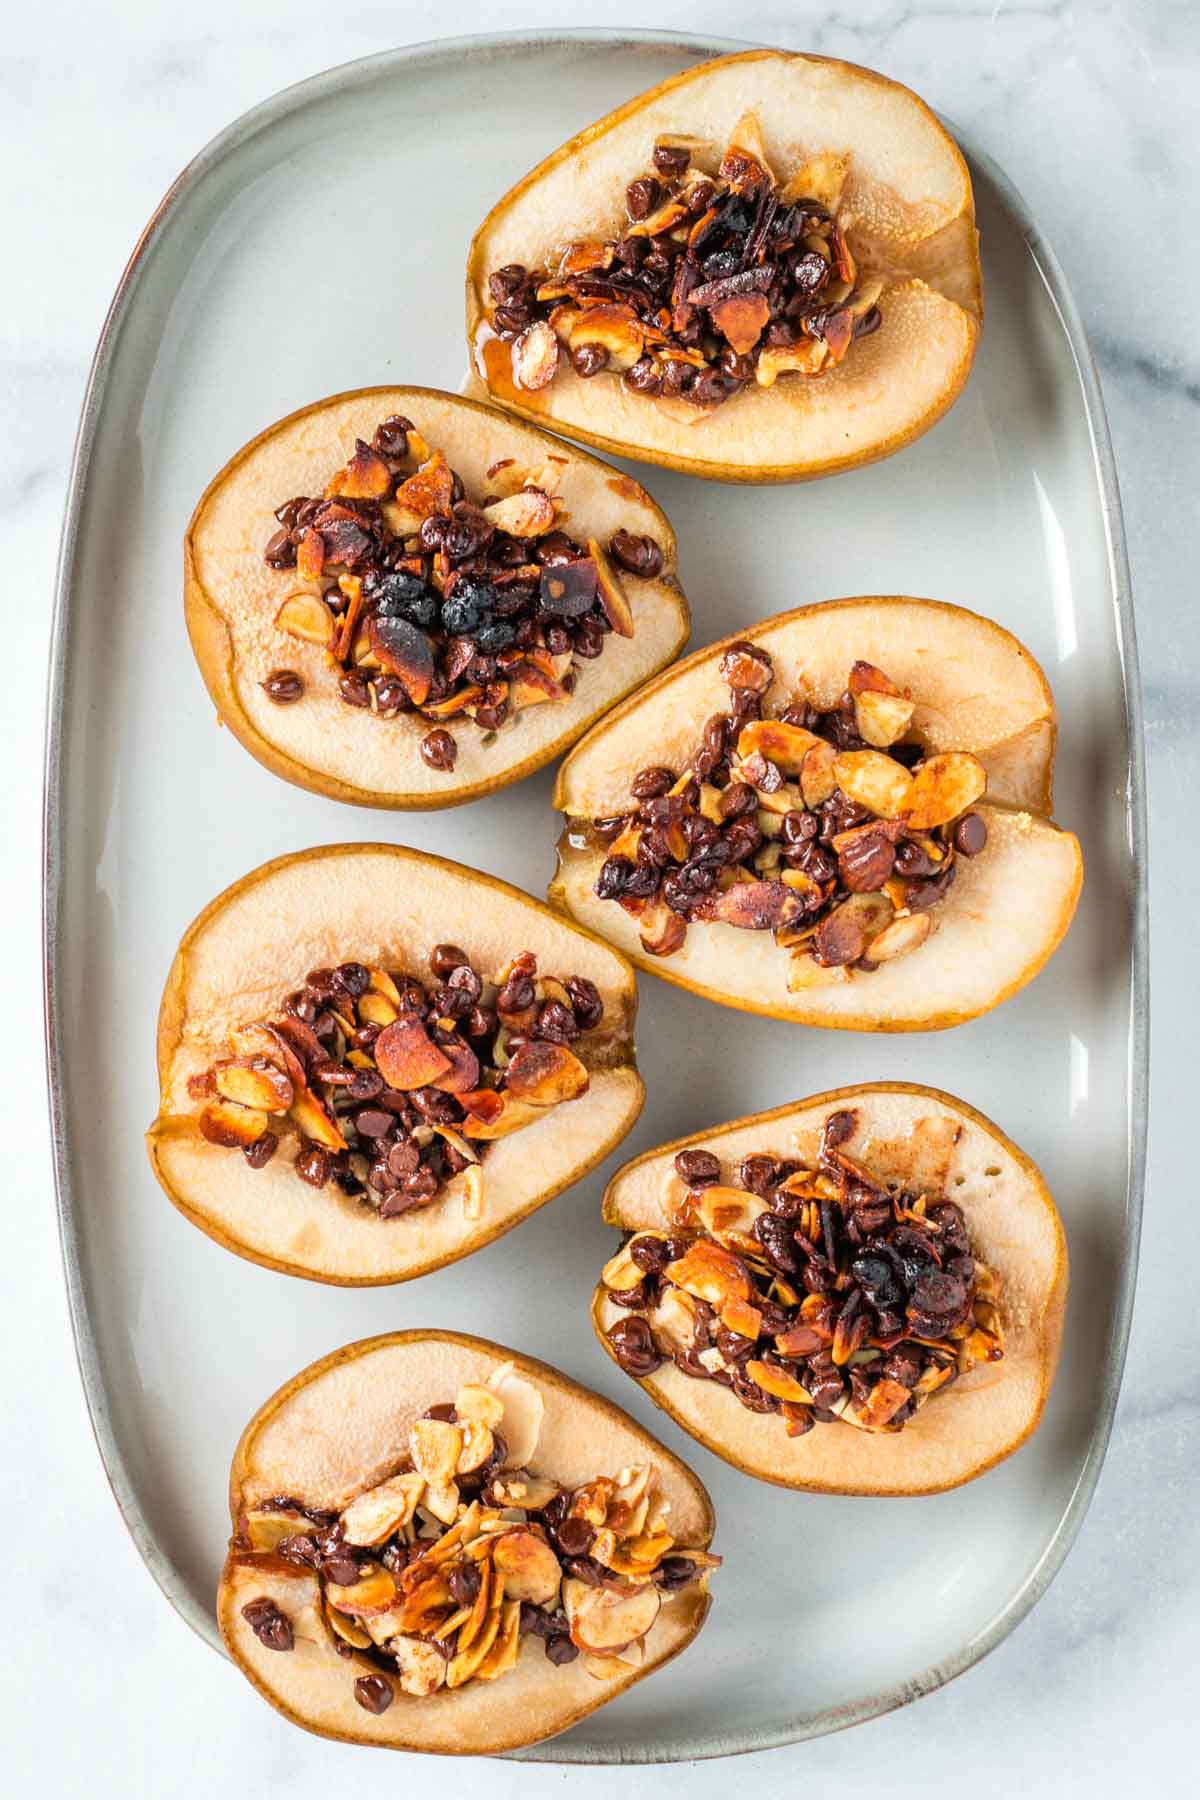
Stuff and Bake Pears
If your pears are super firm and not quite as ripe, par-bake them in a preheated 350 degree oven for 10-15 minutes so they can begin to soften before you fill them.

Use a small paring knife to cut out the bottom roots or the top stem as needed so all of what you put on the baking tray is edible. If you par-baked the pear halves, be careful, they’ll be hot while you fill.

Scoop the chocolate and nut mixture into the cavity of the pears. Continue to add the filling to the pears until it’s all used and pear halves are overflowing.

Bake for 25 minutes, until golden and tender. If you par-baked the pears before filling, check them at 20 minutes.
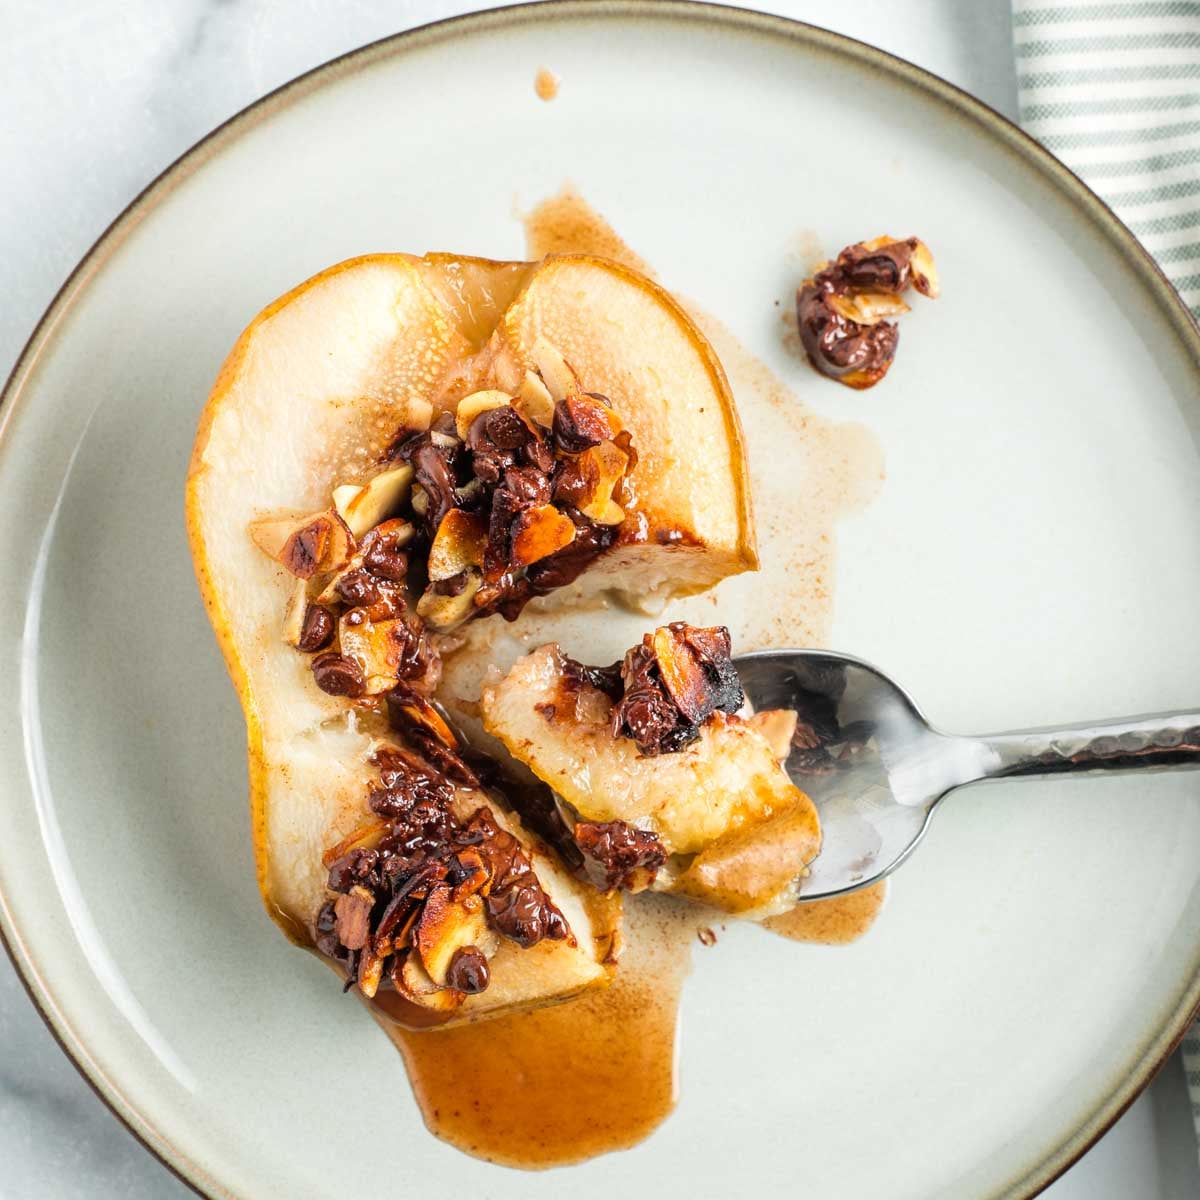
Serve warm with oozing melted chocolate! You can also serve at room temperature or cold, directly from the fridge.
Debra’s Pro Tips
- Hard, firm pears will take longer to become tender when baked. Ripe pears will soften more quickly in the oven, and the outcome will be sweeter.
- Store your unripe pears on the counter at room temp. When they’re soft, transfer to the refrigerator until you’re ready to consume.
- Less ripe pears may benefit from about 10 minutes of baking BEFORE they’re filled, to allow plenty of time for them to soften without overcooking the chocolate almond mixture.
Did you know commenting and rating recipes is one of the best ways to support your favorite food bloggers? If you made this recipe, please consider a five star rating below and leave a comment. Also, please share your photos on instagram by tagging me @dkhealthcoach and using the hashtag #debraklein
📖 Recipe

Simply Baked Pears with Almonds and Chocolate
Ingredients
- 3 pears
- ⅓ cup mini dark chocolate chips
- ⅓ cup sliced almonds
- 1 tablespoon honey
- 1 teaspoon vanilla extract
- ½ teaspoon cinnamon
- ¼ teaspoon salt
Instructions
- Preheat oven to 325
- Mix together almonds, chocolate chips, honey, vanilla, cinnamon and salt. Set aside
- Cut pears in half lengthwise, through the stem. Cut a small sliver off the outside of each half so that it lays flat with the center on top.
- Scoop out the core/seeds of each half. I use a melon baller or sturdy measuring spoon. Use a small paring knife to clean up any other parts of the inside, like stems that wouldn't be soft to eat.
- Spoon chocolate/nut mixture into the cavity of each pear half.
- Bake in preheated oven for 25 minutes. Riper pears will be done a bit sooner, harder pears may take a bit longer. If you start with super firm pears, par-bake them for about 10 minutes without the filling and then fill and bake for 25 minutes.
- Serve warm. Baked pears can be stored in an airtight container (once fully cooled) in the refrigerator for 5 days. These can be enjoyed warm, at room temperature or cold, straight from the fridge.
Notes
Nutrition
Note
The nutrition calculations were done using online tools. To obtain the most accurate representation of the nutritional information in any given recipe, you should calculate the nutritional information with the actual ingredients you used. You are ultimately responsible for ensuring that any nutritional information is accurate, complete and useful.


Leave a Reply