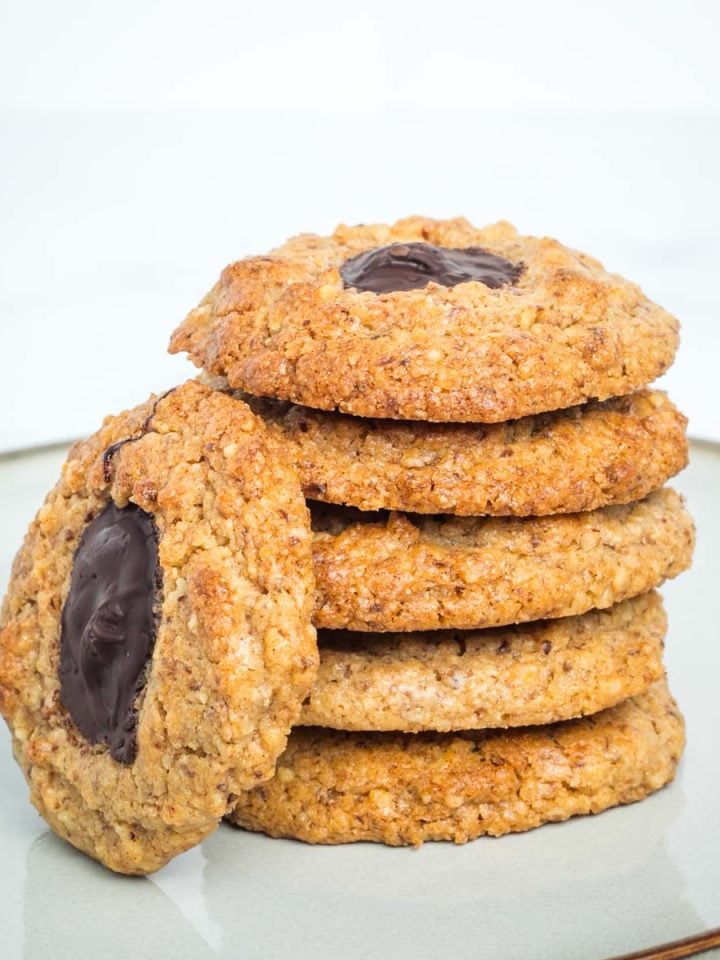
Sweet Round Challah Bread is an essential part of Jewish Holiday Traditions. This challah dough recipe is sweetened with honey, so no sugar, and then divided and braided into round loaves. Perfect for Rosh Hashanah and all the Jewish High Holidays…plus, leftover sweet challah makes excellent french toast!

Jump to:
Making Homemade Challah Bread from scratch is easier than you think and such a special tradition! I’ve been baking challah every week for shabbat plus round loaves of challah for all the holidays for over 25 years, so I know a thing or two about getting that challah dough just right.
On Rosh Hashanah and Sukkot, I add a bit of extra honey into my regular dough for sweeter loaves…symbolic for a sweet new year! I often invite friends over the weekend before the holiday and we do a marathon baking session including plenty of round, braided challah…it sweetens the baking experience when done together.
After you’ve passed around some challah dipped in honey, why not pass around a bit of something more savory to spread on your challah? My two favorite shmears for this challah are vegetarian mock chopped liver and garlic and leek confit.
Looking to start the Jewish new year off with healthy and delicious recipes? No Jewish holiday is complete without an abundance of yummy food. Check out my roundup of Healthy Rosh Hashanah Recipes to add something new to your menus this year.
Ingredient Notes

- Flour: I like to use freshly milled whole grain flour. I have found through baking loaves weekly for years that a combination of bread flour and all purpose flour produces the best challah bread. That said, I bake challah every friday, often when I’m travelling and I have used all kinds of flour and they all work…so use what you have!
- Yeast: Use the packets or measure from a jar…active dry yeast is a better choice than rapid rise.
- Honey: I try to avoid processed white sugar and find that honey does a great job proofing the yeast and sweetening this egg dough.
I totally “get” that this may look intimidating…I’ve included all the photos to make it easier for you to see if what you’re doing is looking “right” compared to the ideal…don’t let the length of this post or the amount of process shots scare you away. It’s all in an effort to make things easier for you. You can do this…and consider all the photos me cheering you on and showing you the way.
Proof the yeast
Honestly, this is the trickiest part…but it’s not at all hard. If you have a kitchen thermometer, that helps to get the temperature of the water hot enough, but not too hot….but it is not essential.

If you have a thermometer, use it until you get used to what the right temperature (anything between 105-110 degrees) feels like. Otherwise, turn on the hot water and let it run until it’s HOT, but not scalding.

Using a 2 cup glass measuring cup is super helpful. The honey will sink to the bottom and you will be able to see when it hits ½ cup. Then add the salt and the yeast and stir well.

Let it sit for at least 5 minutes. During that time the yeast will start to bubble and then “grow” into a cohesive, frothy beige mound on the top. If after 5 minutes your yeast isn’t bubbling or growing, then something is wrong.

Either your water was too hot/not hot enough OR your yeast is no longer fresh….check the expiration date. If yours doesn’t look something like this photo, then dump it and begin again….your challah will not rise if the yeast doesn’t proof.
Make the Challah Dough

Measure out oil and eggs into the bowl of a food processor. Or, you can use a stand mixer. You can also do this by hand.
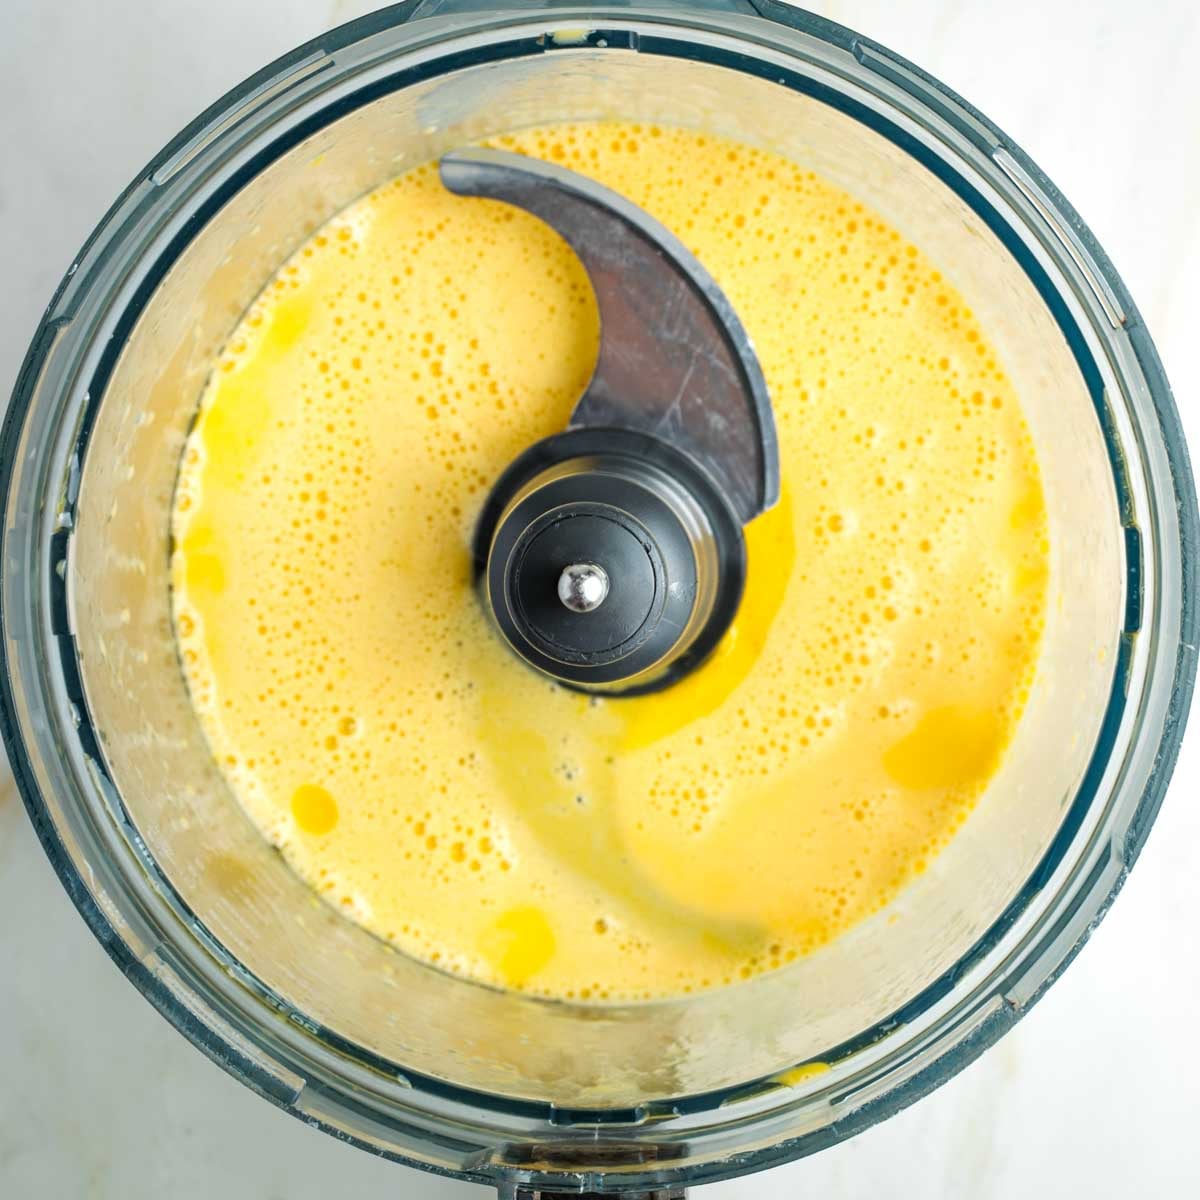
Mix until eggs and oil have emulsified and are frothy.

Once the yeast mixture has proofed, add it to the egg/oil and mix again. It should be very bubbly.

Now sprinkle on half the flour. I use about 1.5 cups all purpose flour and 1 cup bread flour in this first flour addition.

Process that first bit of flour into the liquid ingredients until just mixed.

Now add the other 2.5 cups flour into the mix.

Let the machine do the kneading for you. If the dough is still sticking to the sides (and often the blade or paddle), then you need JUST A LITTLE more flour.

Start slow….sprinkle just ONE tablespoon flour onto the dough.

Mix again. Let the machine run for a minute or two. Your dough should be holding together at this point and not sticking to the sides…but still a bit tacky to the touch. If not, sprinkle on another tablespoon of flour and mix again…but I caution you against adding too much more flour.

Turn dough out onto a LIGHTLY floured surface and if it’s still a bit too sticky to work with, sprinkle a teaspoon extra flour on top.

Knead for about a minute until a smooth ball is formed.

Swirl a tablespoon oil into a large bowl. Carefully place ball of dough in the bowl and turn it on all sides to coat with the oil.

Cover the bowl of dough with a kitchen towel and leave it in a warm spot for at least 2 hours to rise. It should more than double in size and be light and airy.
Divide and Braid

This batch of dough will make three good sized challah. Divide the dough into 12 equal pieces. They will each be about 3 oz. It’s easy with the edge of a dough scraper, or just use your hands. Divide in half, then those pieces in half and continue to halve until you have 12 portions.

Keep whatever dough pieces you are NOT using, covered in a kitchen towel. Each loaf will use 4 of the 12 pieces. If you are doing the 8 strand, then take each of the 4 pieces and cut them in half.
8 strands rolled in seeds

Roll each of the 8 pieces of bread dough into long rope like strands.

Make your pieces of dough equal in length, regardless if some are thinner or thicker.

Prepare a rimmed tray or plate with water and another with sesame and poppy seeds.

Wet a strand and then roll into the seed mixture. Do this with half the strands.

Lay one plain strand and one seeded strand next to each other forming an over/under tic tac toe type grid as shown.

Consider each group of seeded/plain ropes as one unit and cross the top and bottom groups over the under strand.
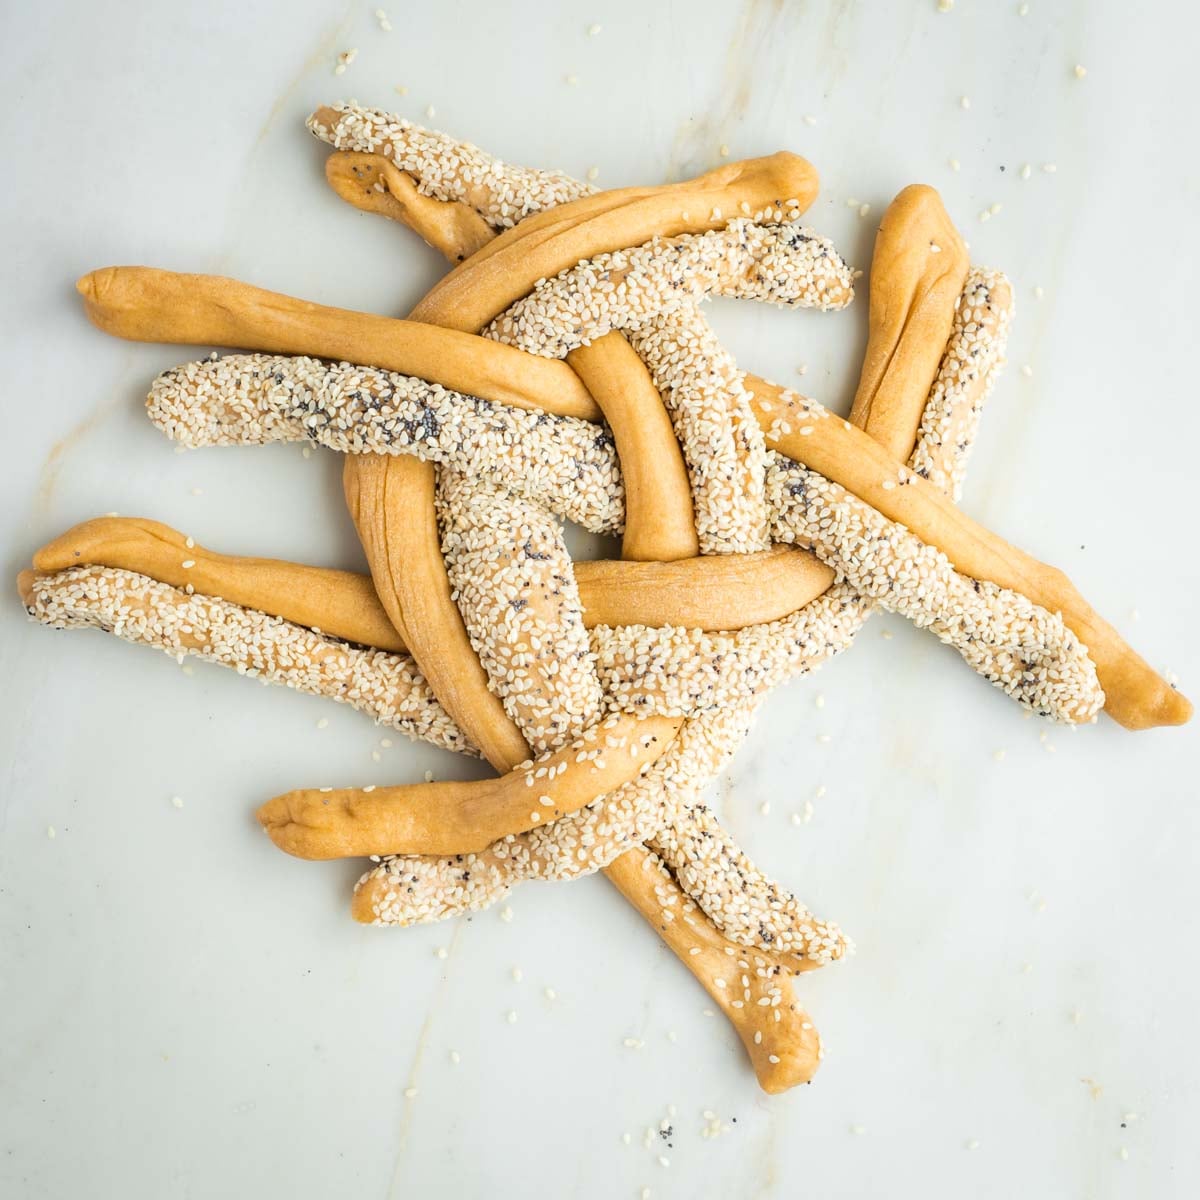
Continue the pattern on the sides working the strands over and under.

Keep the pattern going, keeping the seeded and the plain strands together.

When there isn’t enough length in the strands to cross again, pinch the ends together.

Now, gently tuck those ends underneath the loaf for a round finished product.
4 strands round braid

Roll your pieces into equal lengths, resembling ropes. The smaller pieces may produce thinner strands, but make them all the same length. Start with the 4 pieces in a grid alternating over and under as shown.

Next, cross the top two strands so they continue to alternate between over and under. Repeat with the bottom two strands.

Repeat on the right side and the left side, continuing with the over/under alternating.

Now, work in a circular pattern, crossing open strands over or under.

Keep going until the ends of the open strands are too short to reach their matches.

Pinch together the ends if you can and tuck the remaining strands underneath the loaf so there are no loose edges.
Second Rise and Bake

Transfer your braided loaves to a large rimmed baking sheet lined with parchment paper or a silpat mat.

Cover with a kitchen towel and allow an hour for the second rise. They will definitely swell, though not quite to double in size.

Whisk an egg until frothy and then use a pastry brush to all exposed dough. Skip the parts that already have seeds.

Bake in preheated 350 degree oven for 30 minutes, until golden brown.

Allow to cool completely before wrapping. Challah will stay good in an airtight container for a week…but will taste freshest for 3-4 days. After that, it’s time to make french toast, croutons or breadcrumbs!

Or, wrap in plastic and then aluminum foil and freeze right away, once completely cooled. Defrost at room temperature.
Debra’s Pro Tips

- Proofing the yeast: See photos above for what it will ideally look like. Do not proceed if your yeast didn’t proof….start over.
- Patience: let the dough rise. First rise 2-3 hours (could be longer if that’s what your day looks like). Second rise (after they’re braided) 1 hour.
- Rise the dough: leave your dough to rise in a warm spot. Could be a sunny window or if you have a “proof” setting on your oven (equivalent to 100 degrees).
- Messy braids: Honestly, it doesn’t matter if your braiding is sloppy, or uneven…the challah bread will still be delicious. Plus, it will be obviously homemade…with love….the best addition to any menu.
- Practice: I have probably made well over 2,500 loaves of challah at this point…so I have perfected my craft over the years….and you will too. Start where you are, give yourself some grace and just get in there and do it! I have facetimed nieces, friends and friends of my kids who were willing to get in there and try….and it always works out.
Did you know commenting and rating recipes is one of the best ways to support your favorite food bloggers? If you made this recipe, please consider a five star rating below and leave a comment. Also, please share your photos on instagram by tagging me @dkhealthcoach and using the hashtag #debraklein
📖 Recipe

Sweet Round Challah Bread Recipe
Equipment
Ingredients
- 1 cup hot water 105-110 degrees
- ½ cup honey
- 2 ¼ teaspoon active dry yeast
- ¼ teaspoon salt
- ¼ cup olive oil
- 2 large eggs
- 2 ½ cups whole grain bread flour
- 2 ½ cups whole grain all purpose flour
- 1 tablespoon olive oil
Optional Wash and Sprinkle
- 1 large egg
- 2 tablespoon sesame seeds
- 1 tablespoon poppy seeds
Instructions
Proof Yeast
- Use a 2 cup glass measuring cup and measure 1 cup hot water. Use a thermometer, if you have one, to register around 110 degrees. Otherwise, make it hot to the touch, but not scalding!
- Pour the honey straight into the measuring cup, using the measurements on the side. Sprinkle in the salt and the yeast. Mix well. Let that sit for at least 5 minutes. It will get bubbly and rise up a bit.
Make the dough
- Mix the olive oil and eggs in the bowl of a food processor, fitted with the "S" blade, until frothy.
- Pour in the yeast mixture once it's proofed. Process.
- All at once, add in half the all purpose flour and half the bread flour and process until uniformly mixed. Measure the flour by scooping into a dry measuring cup and leveling it off. If you have a kitchen scale, the 2.5 cups of mixed flour will weigh about 10 ¾ oz.
- Sprinkle on the remaining combination of flour and let the processor knead it for about 3 minutes.
- If the dough is holding together and pulling away from the sides of the processor bowl, you're all set. However, it may be a bit too sticky still. If it's sticking to the sides or clinging to the blade, then sprinkle on 1 tablespoon additional flour and process again. Continue to add 1 tablespoon flour at a time, mixing well each time before attempting to add more flour. The dough should be a bit tacky, just not sticking to your hands when you touch it.
- ERR ON THE SIDE OF LESS FLOUR, NOT MORE.
- Turn it out onto the counter, using 1 tablespoon flour, if needed to prevent sticking. Knead by hand a couple of turns until it resembles a smooth ball of dough.
- Prepare a large bowl with 1 tablespoon olive oil. Transfer the dough ball to the bowl and roll it around, to coat all sides with the oil. Cover with a clean kitchen towel and leave it in a warm spot to rise for at least 2 hours.
- If you have a "proof" setting on your oven (the same as setting it to 100 degrees), you can leave it in there. I place mine in a sunny window.
Braid and Prep the Loaves
- Line a large rimmed baking sheet with unbleached parchment.
- This recipe will make 3 medium sized challah. Divide the dough into 12 equal pieces. They will weight about 3 oz. each.
- Take 4 dough balls to work with and cover the remaining dough with kitchen towel, so it doesn't dry out.
- Use the photos above as a guide. Roll each ball of dough into a long snake. Make a woven grid with two strands across horizontally, and two vertical, going over and under. You can also cut each ball into half to have 8 strands and dip half the strands into water and then sesame seeds. See photos.
- Work your way around, crossing the over strand underneath on each side. Continue as shown on the photos until the strands have come to an end and then tuck whatever is remaining underneath. Transfer to prepared baking sheet.
- Repeat with remaining dough balls until you have 3 challahs on your baking sheet. Cover with the kitchen towel and set the timer for 1 hour.
Baste and Bake
- Preheat oven to 350 degrees.
- Whisk together an egg and then brush onto top of dough. If you didn't dip in seeds before braiding, then sprinkle them onto the challah now, if desired.
- Bake for 30 minutes, until golden brown.
- Transfer to wire rack to completely cool. Then, store in airtight bag until ready to serve. These are freezer friendly. Make sure they're COMPLETELY cool before storing. Wrap in plastic and then in foil for best results. Defrost at room temperature for 6-8 hours. Gently reheat in 300 degree oven for 10 minutes, if warm challah is desired.
Notes
Nutrition
Note
The nutrition calculations were done using online tools. To obtain the most accurate representation of the nutritional information in any given recipe, you should calculate the nutritional information with the actual ingredients you used. You are ultimately responsible for ensuring that any nutritional information is accurate, complete and useful.

Leave a Reply